Introduction
PHPMailer is a widely used PHP library for sending email via SMTP (Simple Mail Transfer Protocol). Compared with the native mail()mail() function, PHPMailer simplifies authentication, encryption (STARTTLS / SMTPS), adding attachments and detailed error reporting. This guide explains, step by step, how to prepare a cPanel account and integrate PHPMailer into a custom PHP application.
Prerequisites
- An operational email address on your hosting (e.g. nom@votredomaine.tld
nom@votredomaine.tld). See "How do I create an email address on my cPanel account?" (cPanel article). - SMTP credentials: host (hostname), port (typically 587 or 465), username (often the full email address) and password.
- DNS records for deliverability: SPF and DKIM enabled for the domain. Use the Email Deliverability tool in cPanel to diagnose (cPanel article) and also see SPF and DKIM.
- PHP (modern version recommended) with useful extensions:
opensslopenssl (for TLS),mbstringmbstring, etc. Check the PHP version and extensions via MultiPHP/Selector in cPanel if necessary. - Ways to install PHPMailer: Composer (recommended) or manual installation (upload the files src/
src/andvendor/vendor/ if you install locally).
Quick summary of steps
- Create the email account in cPanel.
- Check SPF/DKIM and email routing.
- Install PHPMailer (Composer or manual).
- Add the test PHP script and adjust the SMTP settings.
- Test, verify delivery, and troubleshoot if necessary.
Step 1 — Create the email account in cPanel
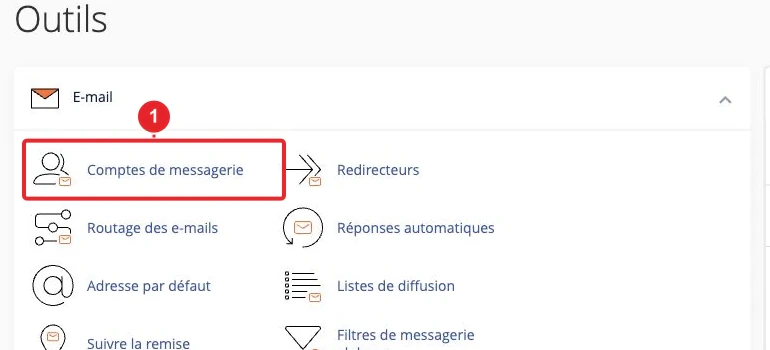
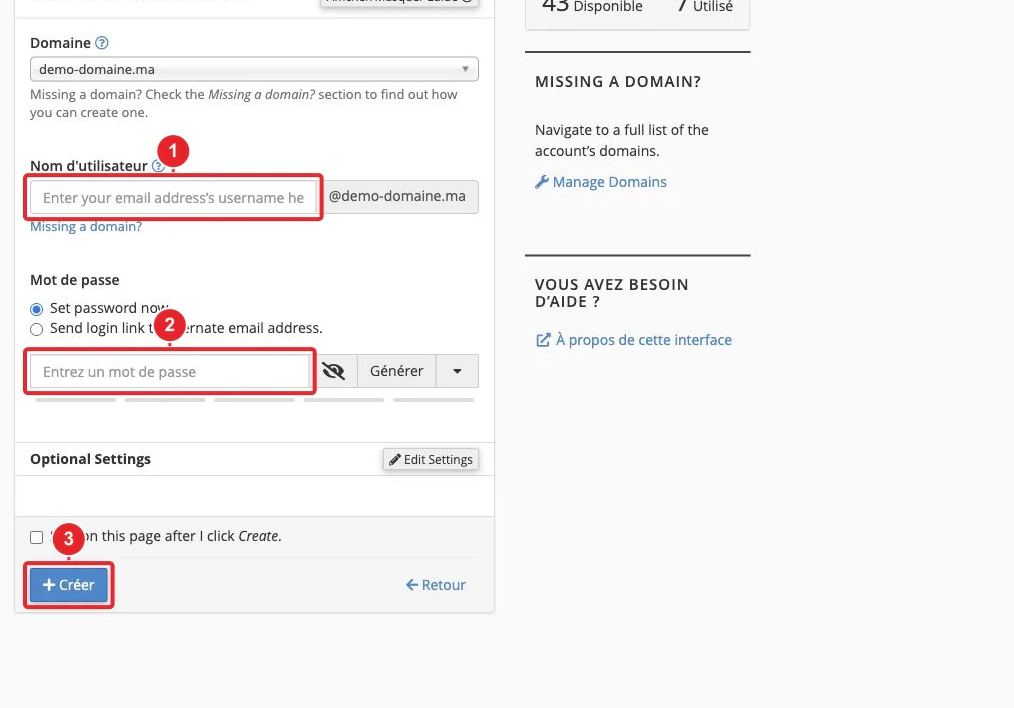
If you don't yet have a dedicated sending address, create one in Email Accounts in cPanel. Keep the address and password: you will need them for SMTP authentication.
Step 2 — Check deliverability and routing
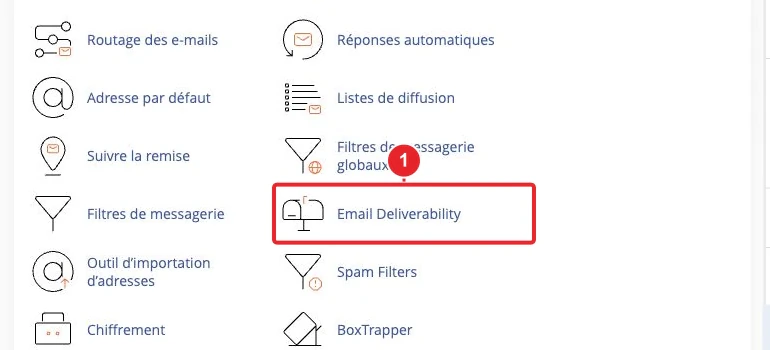
Before regular sending, check that SPF and DKIM are configured for your domain: this reduces the risk that your messages will be marked as spam. In cPanel, open Email Deliverability to obtain a diagnosis and the recommended records.
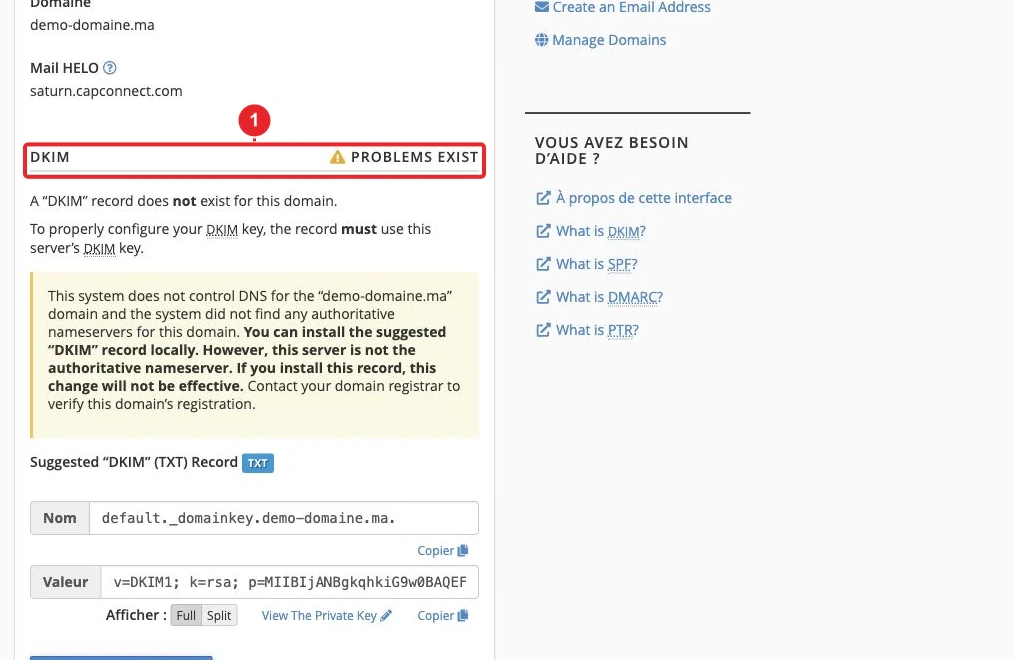
If you use an external SMTP service (Gmail, Office365, Mailgun, etc.), follow that provider's instructions (ports, encryption, app passwords or OAuth2). Also ensure that the MX records and email routing match the chosen provider.
Step 3 — Install PHPMailer
Composer is the recommended method. If Composer isn't available on the server, install PHPMailer locally and then upload the vendor/ folder vendor/ or use manual installation.
Option A — With Composer (recommended)
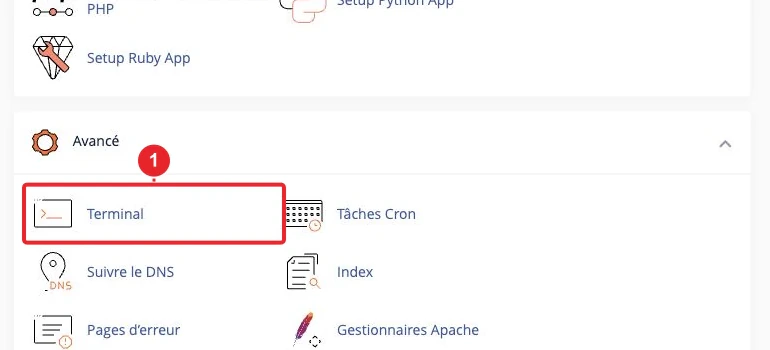
- Check that Composer is available (via SSH or the cPanel Terminal):
composer --version - From your application's directory (e.g. public_html/monapp/
public_html/monapp/) run:composer require phpmailer/phpmailer - On the server, include the autoload file in your scripts:
require __DIR__ . '/vendor/autoload.php';
If you cannot run Composer on the server: run composer require phpmailer/phpmailer on your local machine, then upload the vendor/ folder vendor/ and your application files to the server (FTP or File Manager).
Option B — Manual installation
- Download the PHPMailer archive from the official repository (ZIP archive), extract the folder
src/. - Place the required directories (src/
src/) into a folder of your application and include the files directly:require 'PHPMailer/src/Exception.php'; require 'PHPMailer/src/PHPMailer.php'; require 'PHPMailer/src/SMTP.php'; - If you created the folder locally
vendor/, use the cPanel File Manager or FTP to upload (e.g. upload the .zip and extract it on the server).
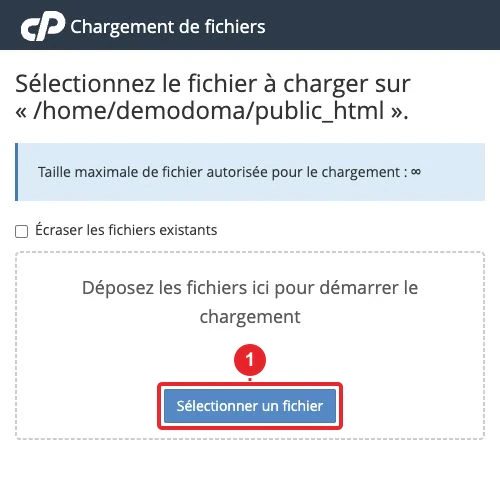
vendor/ if you install locally.Step 4 — Example PHP script (SMTP configuration)
Minimal example (PHPMailer v6+, installed via Composer) — adapt the values Host, Username, Port and Password :
<?php
require __DIR__ . '/vendor/autoload.php';
use PHPMailer\PHPMailer\PHPMailer;
use PHPMailer\PHPMailer\Exception;
use PHPMailer\PHPMailer\SMTP;
$mail = new PHPMailer(true);
try {
// Paramètres SMTP
$mail->isSMTP();
$mail->Host = 'smtp.votredomaine.tld';
$mail->SMTPAuth = true;
$mail->Username = 'nom@votredomaine.tld';
$mail->Password = getenv('SMTP_PASS'); // ou récupéré depuis un fichier de config hors public_html
$mail->SMTPSecure = PHPMailer::ENCRYPTION_STARTTLS; // ou PHPMailer::ENCRYPTION_SMTPS
$mail->Port = 587; // 587 (STARTTLS) ou 465 (SMTPS)
// Destinataires et contenu
$mail->setFrom('nom@votredomaine.tld', 'Nom affiché');
$mail->addAddress('destinataire@example.com', 'Nom destinataire');
$mail->isHTML(true);
$mail->Subject = 'Sujet du message';
$mail->Body = 'Bonjour, ceci est un message de test.
';
$mail->AltBody = 'Bonjour, ceci est un message de test.';
$mail->send();
echo 'Message envoyé';
} catch (Exception $e) {
// n'affichez pas les mots de passe en production
error_log('PHPMailer Error: ' . $mail->ErrorInfo);
echo 'Erreur d\'envoi : ' . $mail->ErrorInfo;
}
Useful options for debugging
To obtain the SMTP trace (do not enable in production):
$mail->SMTPDebug = SMTP::DEBUG_SERVER; // sorties détaillées
$mail->Debugoutput = function($str, $level) {
    error_log('PHPMailer SMTP: ' . $str);
};
Special case: TLS/SSL certificates in development
If you see certificate-related errors in a test environment, you can (temporarily) allow a self-signed certificate. Never leave this enabled in production:
$mail->SMTPOptions = [
  'ssl' => [
    'verify_peer'       => false,
    'verify_peer_name'  => false,
    'allow_self_signed' => true,
  ],
];
Step 5 — Test and verify delivery
- Run the script from the browser (e.g.
https://votredomaine.tld/monapp/test-mail.php) or from the CLI (php test-mail.php). - If sending fails, enable PHPMailer debugging and check the PHP/server logs (errors and SMTP traces).
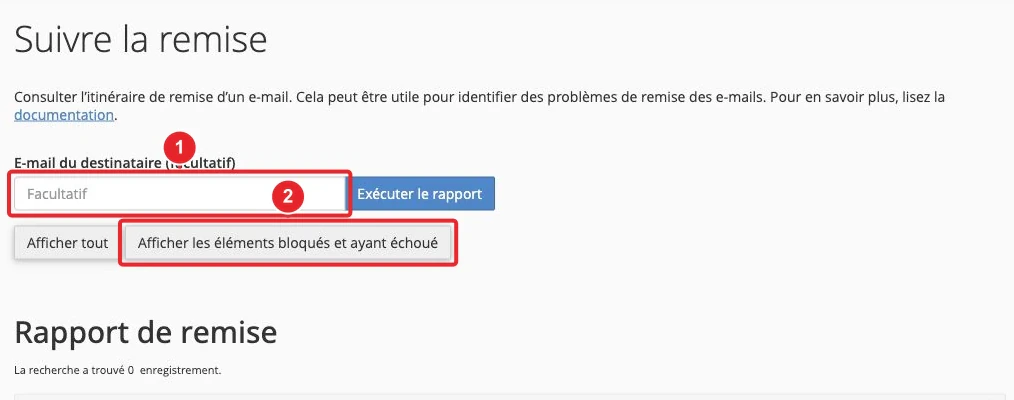
- Use the tool Track Delivery in cPanel to track the message path and read the error codes returned by remote servers.
Common troubleshooting (quick reference)
- "SMTP connect() failed" / Connection refused
- Check
Host,PortandSMTPSecure(STARTTLS on 587, SMTPS on 465). - Test connectivity from your machine:
telnet smtp.votredomaine.tld 587 # ou openssl s_client -starttls smtp -connect smtp.votredomaine.tld:587 - On shared hosting, some outgoing SMTP connections may be restricted: contact support if necessary.
- Check
- Unable to authenticate
- Verify that the username is the full email address and that the password is correct (no trailing space).
- For Gmail/Office365, enable an app password or OAuth2 if the provider requires it.
- Recipient-side rejection / message marked as spam
- Check the error code returned by the recipient server (via Track Delivery or SMTP logs).
- Ensure SPF and DKIM are correctly published and that your DMARC record is appropriate.
- TLS certificate error
- Check that the SMTP server presents a valid certificate chain. In development only, you can relax verification (see SMTPOptions), but correct the chain in production.
- Missing attachments
- Check file paths, permissions and the upload limits imposed by your host.
Best practices
- Do not store passwords in plain text in a public script. Place the configuration outside of
public_html<code>public_html</code> or use environment variablesgetenv()(<code>getenv()</code>). - Enable and verify SPF and DKIM to improve deliverability.
- Disable detailed SMTP debugging in production (it may contain passwords).
- For large mailings (newsletters, mass notifications), prefer a dedicated sending service (SMTP relay) that handles quotas and reputation.
Limitations and points to check
- On shared hosting plans, direct outbound sending on port 25 or other ports may be blocked or limited; check with your host.
- Some providers require OAuth2 (Gmail, Office365); OAuth2 integration requires additional steps (libraries and configuration).
- Sending quotas (messages/hour) may apply at the server level: check your host's policy if you expect high volume.
Checklist before production deployment
- Email account created and credentials validated.
- SPF/DKIM configured and diagnostic OK.
- PHPMailer installed and autoload is working.
- Script tested in pre-production; debug logs saved outside the public site.
- Secure mechanism to change/rotate passwords (password rotation).
Useful internal resources
- How do I create an email address on my cPanel account?
- How do I use the Email Deliverability feature in cPanel?
- SPF and DKIM: How can I improve the reputation of emails sent from cPanel?
- Track Delivery: How to track your emails in cPanel
If a problem persists, open a ticket from your client area and attach the PHPMailer debug output (warning: remove passwords before sharing). Indicate the time of the test so support can consult the server traces.
Documentation consulted on 17 October 2026. Tools may vary depending on your hosting.