An SSL certificate (Secure Sockets Layer) is a small data file installed on a web server that enables a secure connection between the server and a web browser. SSL certificates are issued by a trusted certificate authority. When an SSL certificate is installed on a web server, it activates the HTTPS protocol. The use of an SSL certificate on a website is usually indicated by a padlock icon and a URL starting with https://.
Table of Contents
Hosting purchased from Cap Connect
If you have opted for a web hosting service from Cap Connect, you benefit for free from the SSL certificate. Activation happens automatically. However, you need to wait for a few minutes for it to take effect. You can also try to force your SSL certificate on cPanel.
Hosting purchased from another provider
After purchasing an SSL certificate from Cap Connect, its configuration is done on your client area, in three steps:
Generating the CSR
You will find instructions to generate a CSR file on your hosting. This code will allow the configuration of the certificate from your client area.
SSL Configuration in your Client Area
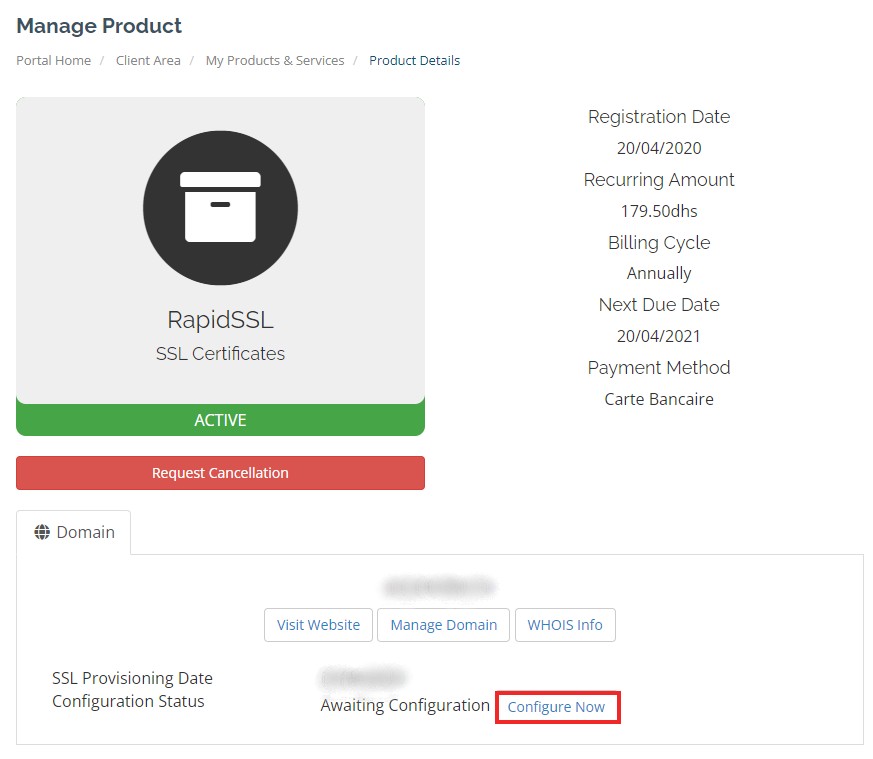
Log into your client account 
On the SSL certificate management page, click on Configure Now

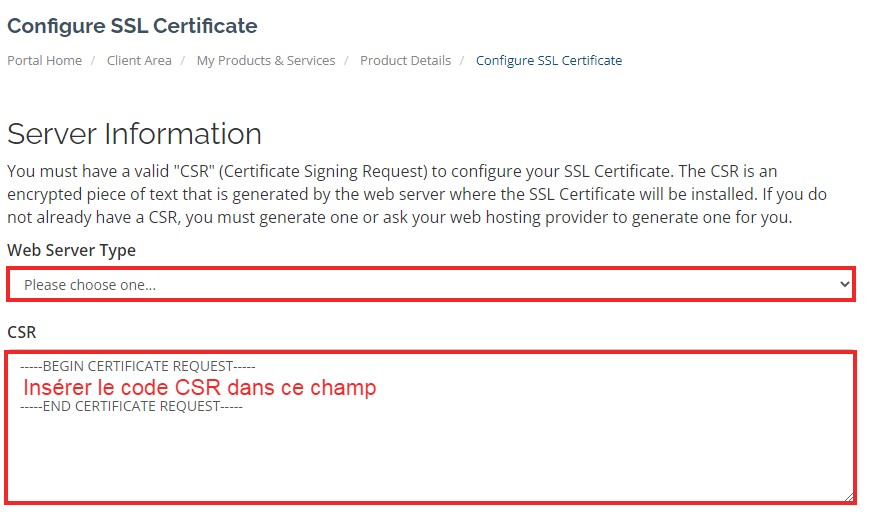
Choose the server type where the SSL certificate will be installed, then copy the CSR code from the previous step, which will be required during the generation of the SSL certificate, and paste it into the appropriate field.


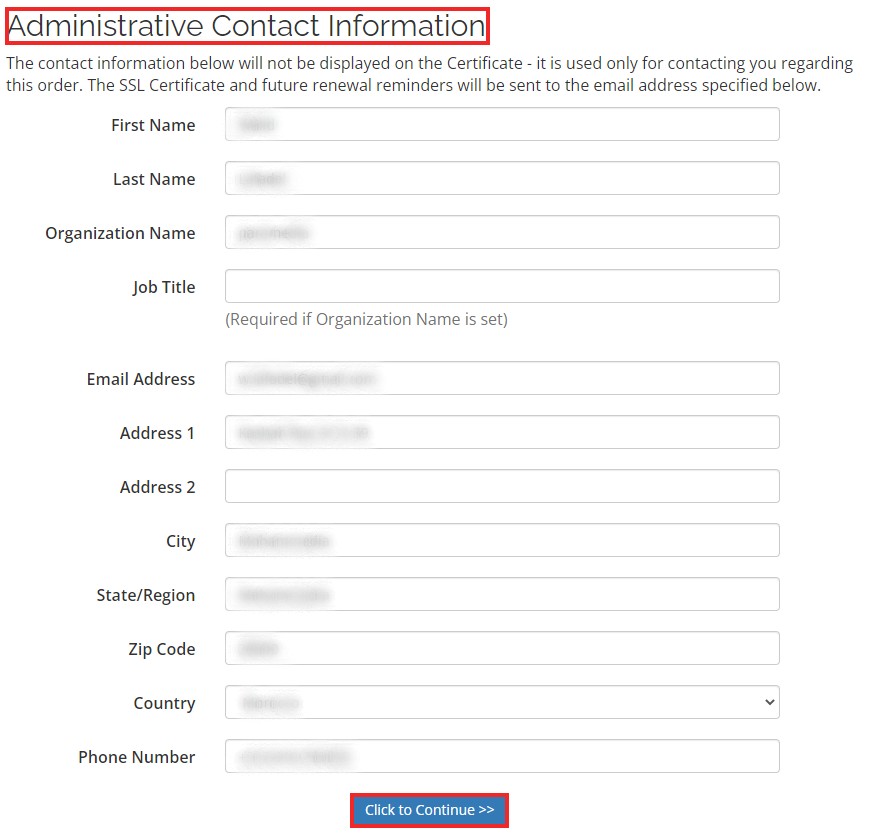
On the next page, choose the Approval email. Here are examples of generic email addresses that may be requested:
- admin@yourdomain.com
- administrator@yourdomain.com
- hostmaster@yourdomain.com
- webmaster@yourdomain.com
- postmaster@yourdomain.com
You will receive a validation email for the DV certificate type. For other certificate types, OV and EV, you will need to validate your address and phone number.
Installing the SSL Certificate on cPanel
Once your domain is validated, wait a few minutes and go to the product page of the SSL certificate you installed, where you should be able to download your certificate: 
Then go to your cPanel -> “SSL/TLS”, and click on “Manage SSL sites” in the Install and Manage SSL for your site (HTTPS) section.

Select the appropriate domain name where you want to install your SSL certificate.

Once you have selected your domain, simply copy and paste the content of your certificate into the CRT field.
Certificate (CRT) – This is your server certificate that has been issued for your domain(s). cPanel should automatically retrieve the certificate text (CRT) if you previously downloaded the server certificate in the “Generate, View, Download, or Delete SSL Certificate” section of your SSL/TLS manager and selected the correct domain name above from the dropdown. If you received the certificate in a ZIP file, click “Extract All,” then drag your server certificate into a text editor like Notepad. This will allow you to copy the entire necessary certificate text, including “—–BEGIN CERTIFICATE—–” and “END CERTIFICATE—–.”
Private Key (PRIVATE KEY) – This is your private key that was created during the generation process. cPanel should automatically retrieve the private key text if you previously created the certificate signing request (CSR) in the “Generate, View, or Delete Certificate Signing Request” section of your SSL/TLS manager and selected the correct domain name above from the dropdown. If you created the CSR and private key outside of your cPanel account and did not save the files, you will encounter issues and may need to reissue the SSL certificate with a newly created key pair.
Certificate Authority Bundle (CABundle) – These are your intermediate certificates that allow browsers and devices to understand who issued your trusted certificate. cPanel should automatically retrieve the CA bundle from a public repository. If not, download the appropriate CA Bundle for your certificate. If you have multiple intermediate certificates, paste them one after the other to create the correct certificate chain/path.
Once you have the correct certificate files in the appropriate text fields, simply click on the blue Install Certificate button.
Congratulations! You have successfully installed your SSL certificate! To ensure it works correctly, visit your website in your browser at https://yourdomain and check the certificate/site information to confirm that HTTPS/SSL is working properly.