Create a site with Codex, preview it locally, then deploy it to your cPanel hosting using a cPanel API token.
Once the initial setup is complete, you can continue to modify the project locally and publish only the necessary files.
The connection is made from a script run inside your local project: that script calls the cPanel API using the token. It is not necessary to enable the Meridian theme or to configure an MCP connection to follow this method.
What to prepare
- Required information A cPanel account with the Manage API Tokens
- option available.
- Codex installed on your computer, with a project folder open and the ability to run local commands.
- The cPanel server name, your cPanel username and the domain on which to publish the site.
Hosting compatible with the project: a static site and a Node.js application have different requirements.
Token security
The cPanel token grants access to your hosting. It is different from an OpenAI API key, which is used to access OpenAI services. Your cPanel password is not required for API calls authenticated with this token.
1. Create an API token in cPanel
ProcedureLog in to your cPanel account , then search for Manage API Tokens in the Security
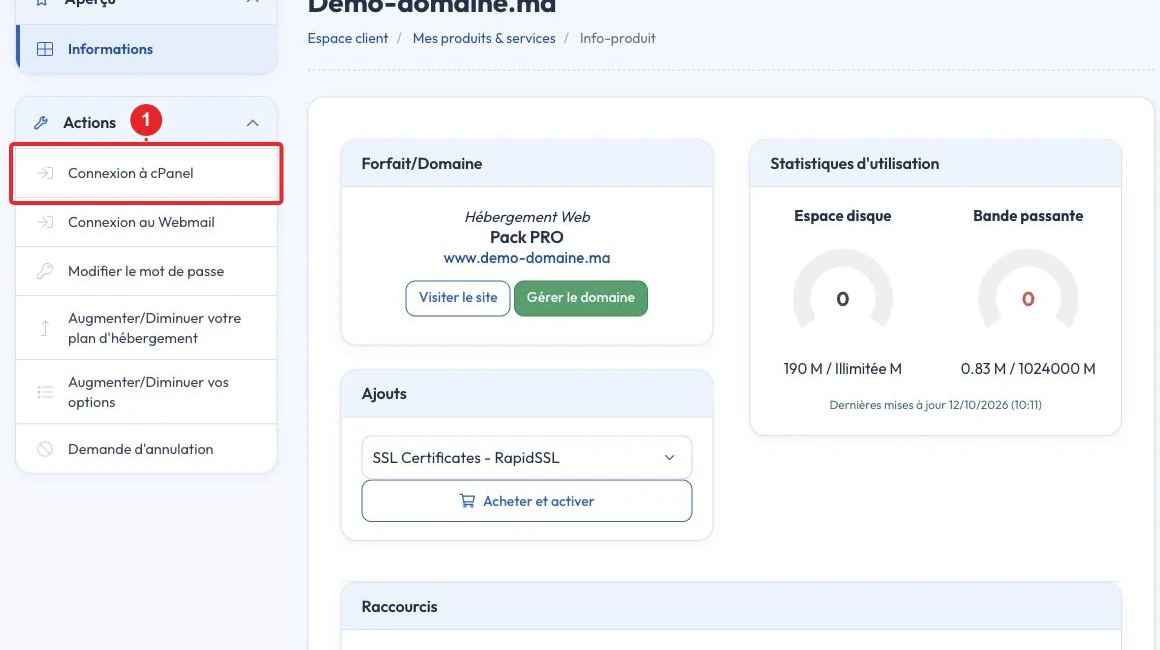
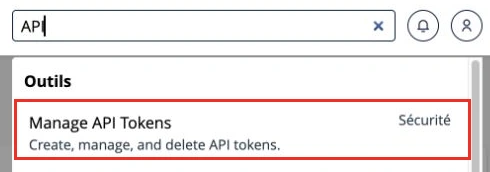
- Search for "API", then open Manage API Tokens in cPanel. ClickCreate
- .
codex-site-vitrineGive the token an identifiable name, for example codex-site-vitrine - .
- Choose an expiration date appropriate for your project.
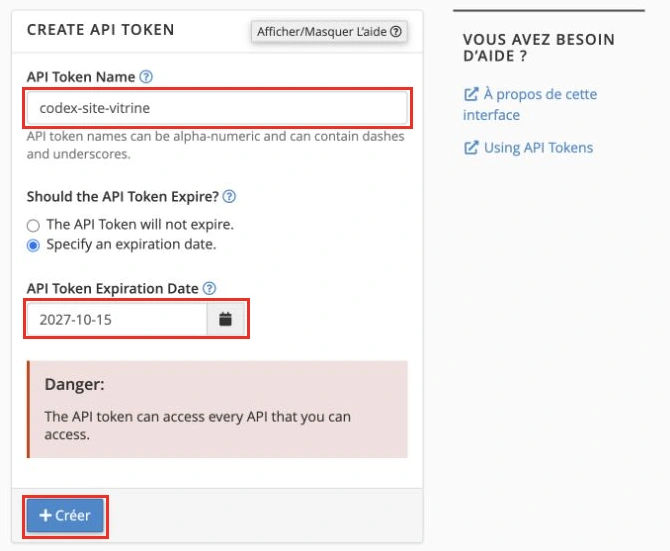
Enter a name and choose an expiration before creating your token. This screenshot contains no API keys.
If the option does not appear, open a ticket from your client area to check its availability on your account. Do not create a WHM token instead: this guide uses a cPanel account token.
2. Prepare the site in Codex
Describe the project
Open a folder dedicated to your project in Codex. Describe the desired site, its pages, color palette and useful features. You can start with this request:
Create a responsive showcase site for my business, with a homepage, an about page, a services page and a contact page. Prepare a local preview. The site will be hosted on cPanel: check the compatibility of the solution before choosing the technology. Finish with tests and a deployment‑ready version.
Dynamic features
Specify requirements that go beyond a static site: a form that sends email, a database, an admin area or user authentication. A form displayed on the page is not sufficient to guarantee messages are sent: its processing must also be configured and tested.
For an HTML/CSS/JavaScript site or a project exported as static files, cPanel can serve the built files directly. For an application that requires a Node.js server, ask Codex to check the Node engine, process management and the capabilities offered by your hosting plan before deployment.
3. Provide Codex with the connection settings
Private configuration file
Ask Codex to create a private configuration file, then fill it in within the local editor:
work/cpanel-credentials.envPrepare a private file work/cpanel-credentials.env
CPANEL_HOST=serveur.exemple.net
CPANEL_USERNAME=mon_identifiant
CPANEL_API_TOKEN=COLLER_LE_JETON_ICI
CPANEL_DOCUMENT_ROOT=/home/mon_identifiant/public_html
containing the fields below:
CPANEL_HOST=serveur.exemple.net
CPANEL_USERNAME=mon_identifiant
CPANEL_API_TOKEN=COLLER_LE_JETON_ICI
CPANEL_DOCUMENT_ROOT=/home/mon_identifiant/public_html
Add this file to your Git excludes and to deployment excludes. I will fill the token locally. Do not read or display its value in the conversation or logs. CPANEL_HOST Replace these examples with your account information. https:// is the hostname of the cPanel server, without https:// or any path /home2/The site's folder must be verified in cPanel: it may be different for an addon domain, a subdomain or an account located under /home2/
.
The file containing the token must remain outside the public directory and the files uploaded to the site. On macOS or Linux, Codex can also restrict the file permissions to the owner. Mechanisms for protecting private files are different on Windows.
4. Test API access without modifying the site
Read-only test
Before the first upload, request a read-only test:
Variables/get_user_informationCreate a small local script that reads the private configuration file and tests cPanel authentication over HTTPS on port 2083 using UAPI Variables/get_user_information
. Authorization: cpanel IDENTIFIANT:JETONVerify the TLS certificate and the status of the API response. Display only whether the connection works, without showing the token or the account's full data. Do not modify any remote files.
cPanel authentication uses a header of the form
Authorization: cpanel IDENTIFIANT:JETON.
The token belongs in the request header; it must not be placed in the URL.
If the test succeeds, Codex has a method to perform the operations you request via the API. The success of this test does not mean that a site has been published, nor that all API functions are available on your hosting plan.
5. Upload the site to your cPanel hosting
Prepare the deployment Fileman/upload_files First validate the local preview, then ask Codex to prepare the deployment:
Prepare the deployment of the validated site to the specified domain. Verify its document root in cPanel, generate the production files and back up the remote files that will be replaced. Use the private token with the cPanel API to upload the required files. Exclude secrets, development files and unnecessary dependencies. Present the domain, the target folder and the changes before the first upload.
For a static site, Codex can use the UAPI function Fileman/upload_files
to upload the files into the target folder. You must upload the build output when a build is required, and not assume that the source files will work directly on the server.
If a site already exists in this folder, check the backup and the scope of replacements. Visitor‑uploaded content, configuration files and databases must not be overwritten by a code deployment.
A dynamic application requires additional preparation: runtime engine configuration, environment variables, dependencies and application startup. Uploading files does not replace these steps.
- 6. Verify the site online
- Post‑deployment checks
- After deployment, ask Codex to open the public address and check the following points:
- The main pages respond correctly over HTTPS.
- The menu, links, images and CSS/JavaScript files work.
The layout remains readable on mobile.
Forms and dynamic features have been tested with sample data.
No private file or token is accessible in the published files.
If the domain does not yet point to the new hosting, the files may have been uploaded correctly without the domain showing that server. File deployment, DNS configuration and the HTTPS certificate are separate steps.
How to update the site afterwards?
Update workflow
You keep the same local project and the same connection configuration as long as the token remains valid. Describe the change in Codex, verify the preview and request a new deployment:
Modify the services section and improve its mobile presentation. After local checks, deploy the necessary production files to the same cPanel site. Preserve data, private configuration files and content added since the last publication. Verify the result online.
- It is not necessary to reinstall the site for every change. The deployment script can compare files to send the meaningful changes. With some build tools, a modification regenerates multiple files: they must be uploaded together to keep a coherent version. Troubleshooting common connection errors
- Quick diagnosis Authentication refused:
- check the cPanel username, the token, its expiration date and the targeted server. A revoked token must be replaced. Cannot connect on port 2083:
- check the server name and network access to the cPanel service. Do not use the WordPress admin address instead. Certificate error:
- use the hostname that matches the server's certificate. Do not disable TLS verification to bypass the error. Files uploaded but site unchanged:
check the domain's document root, the build output and any caches.
Error after deployment:
check the application or hosting logs. If necessary, restore the files backed up before the upload. Manage the token after deployment Best practices