In some cases, you may need to import a MySQL database onto your cPanel hosting.
phpMyAdmin is a web administration tool integrated into cPanel that allows you to manage, import, and export MySQL and MariaDB data, as well as perform other administrative tasks related to database management.
However, a database is considered large for phpMyAdmin when its size reaches 250 MB. If you attempt to import a database of this size using phpMyAdmin, you may encounter issues such as runtime errors, memory errors, or even the inability to complete the import process.
Fortunately, there are other methods to import a large database to a cPanel hosting account without facing these issues. This documentation introduces more efficient alternatives to phpMyAdmin for importing large databases into your cPanel hosting.
Table of Contents
Step 1: Create a Database for Your Data
Before importing your database into your cPanel hosting, you need to create a new, empty database on your cPanel account to receive the exported data. Follow these steps:
Log in to your cPanel account.
Navigate to the Database section and click on MySQL Databases.

Create a new database by giving it a name, then click the Create Database button.

Next, add a MySQL user at the bottom of the page.

Choose a username, generate a password, and save it carefully. Then click the “Create User” button.
Associate the MySQL user with the database you just created. To do this, go to the bottom of the page, select the database and user you created, then click the “Add” button.

On the next page, check the “ALL PRIVILEGES” box and click the “Make Changes” button.

Your database is now created and ready to receive your data import. Ensure you securely save information such as the database name, username, and password, as you will need them later.
Step 2: Import Your Large Database via cPanel Terminal
Due to the large size of your exported database, it cannot be imported directly via phpMyAdmin. Instead, use the cPanel Terminal to retrieve and save the data in the database created in Step 1. Follow these steps:
Upload your SQL database file to your FTP space.
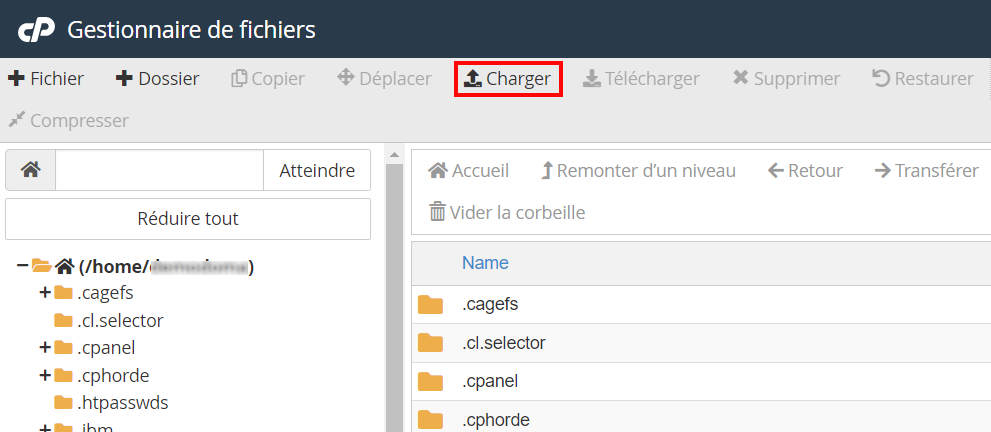
To do this, access your cPanel, then click the File Manager button.

Navigate to the folder where you want to upload your database, then click the Upload button. It is recommended to place it in the public_html folder, which corresponds to your primary site’s root directory.

Select your .sql file to upload and confirm.
Once the file is successfully uploaded, return to your cPanel home page.
Next, locate the Advanced section and click on Terminal.

Using the Terminal, navigate to the folder containing your SQL database export file.
When you open the Terminal, you are generally at the root of your cPanel. Since websites are stored in the public_html folder, it is common to upload files there.
To navigate to this folder, use the following command:
cd public_html
If you stored your SQL export file in a specific folder, adapt the command accordingly. For example, if it is stored in a folder named “database_folder” inside “public_html,” the command would be:
cd public_html/database_folder
Use one of the commands below to import your database.
Enter the following command:
mysql -u database_username -p database_name < file.sql
/* Replace database_username with your database user name */
/* Replace database_name with the database name you previously created on cPanel */
/* Replace file.sql with your file name */
You will then be prompted for the database password. Enter it and press Enter (note that what you type will not be visible in the terminal).
Database import can take several minutes, depending on its size.
The import is complete when the following line appears in the terminal:
-bash-4.2$
That’s it! Your database has been successfully imported into your cPanel hosting.