You can manage the DNS zone of your domain name by following the steps below. This zone is the database containing all the information related to your DNS (Domain Name System).
Table of Contents
What is a DNS Zone?
A DNS zone refers to a section or administrative space within the global domain name system (DNS). All entries in a domain’s zone, such as subdomains (sub.domain.com) or an MX record (which specifies the location of the mail server), are found in this zone.

A domain name can be used for different services: email addresses, one or more websites, an FTP service, etc. For each service, the domain name must be configured to point to one or more “DNS servers” that redirect emails or requests to your site or the corresponding service.
Types of Records in the DNS Zone
A: This record links a domain name to the IP address (IPv4) of a server.
CNAME: A canonical name record that allows a hostname to be mapped to the DNS record of another hostname, functioning as an alias.
MX: Mail Exchange. This type of record points the domain name to a mail server.
NS: Name Server records determine which server manages the DNS zone of your domain name.
TXT: Text. This record allows you to add text to the DNS zone to indicate information about the domain.
PTR: Pointer. This record enables reverse DNS lookup: obtaining a domain name from a given IP address.
SOA: Start of Authority. This record contains several pieces of information indicating whether the queried server is responsible for this zone.
How to Add a DNS Record?
To add an entry to the DNS zone of your domain name, follow these steps:
First, keep the default DNS Servers (Nameservers):
ns1.capconnect.com
ns2.capconnect.com
ns3.capconnect.com
ns4.capconnect.com
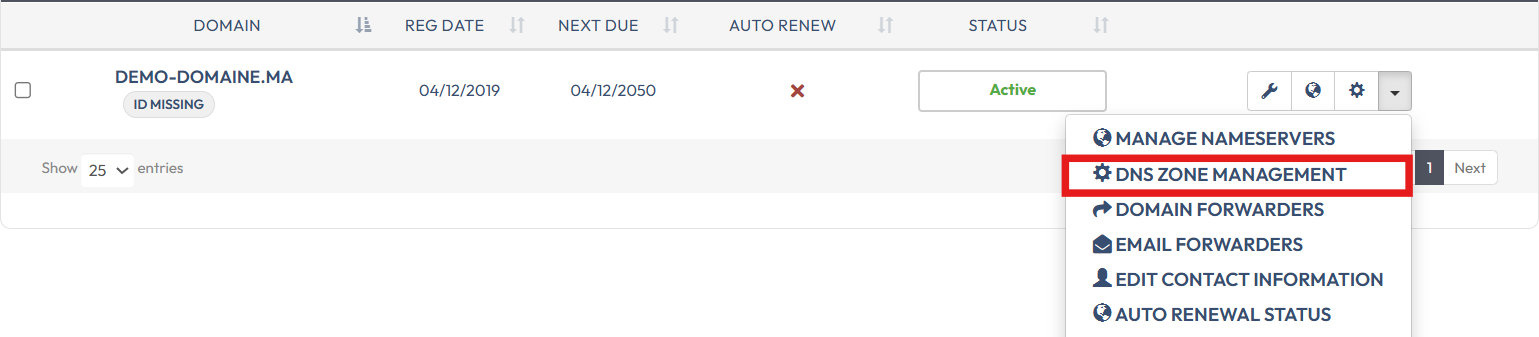
1. Log in to your Client Area.
2. Click on “Domains”.

3. Go to the domain in question, click on the configuration icon

Or, click on the menu on the right, then click on “DNS Zone Management”
4- Add a new DNS record.
- The first field, Type. This is very important as it corresponds to the service for which you will assign it. For example, type A for web or MX for email.
- The second field Host Name. Depending on the need, you will need to indicate what comes before the domain, e.g., “www”, use “@” for the root domain.
- The third field, Address/Value. If you select type A, you must specify an IP address in this field, such as “194.116.202.20”.
- The second field, TTL. This field represents the cache in seconds, with 3600 equating to 1 hour.

To delete or modify an existing record, simply click on the corresponding button next to the record in question, then hit save.

A DNS change normally takes effect after propagation, which can take several hours.
Video Tutorial
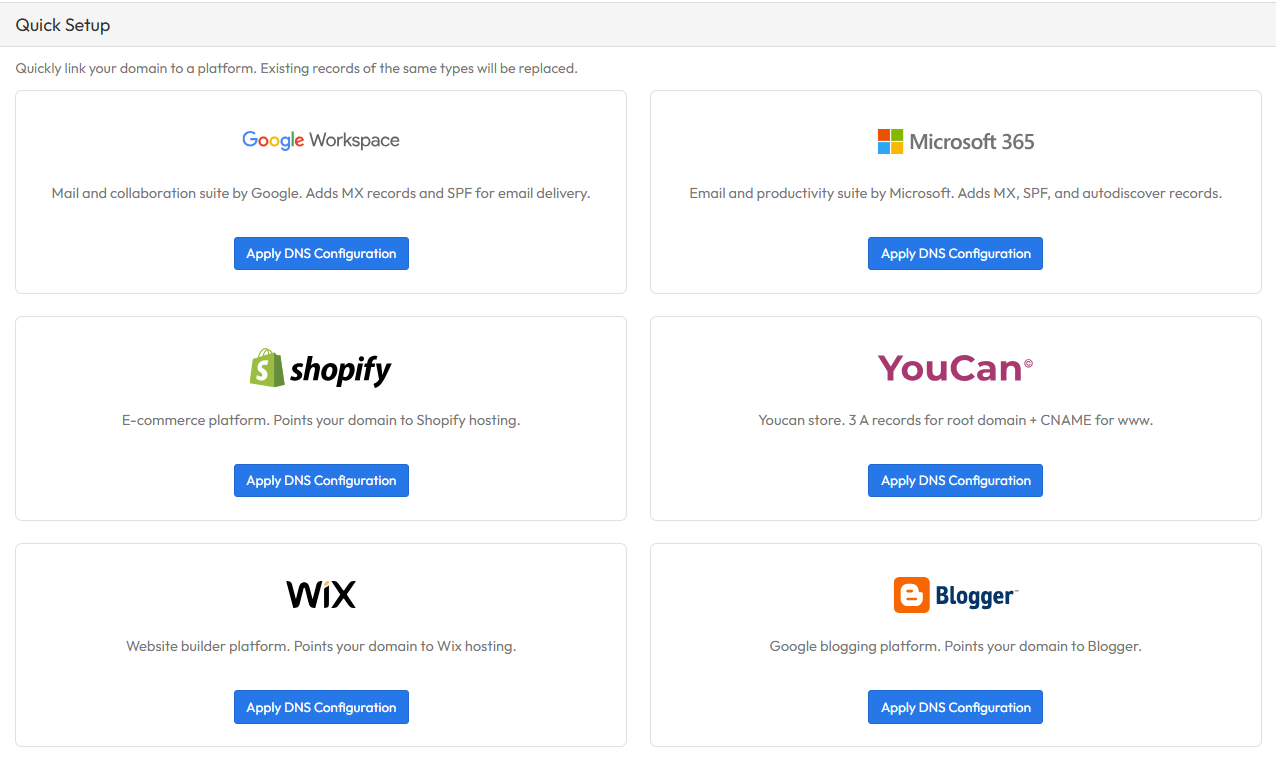
NEW FEATURE: You can now configure your domain name with multiple services such as Shopify, YouCan Shop, and Google Workspace—in just one click.
Simply scroll down to the Quick Setup section and click on Apply DNS Configuration.