You can link your domain name to your Blogger account, a free platform designed for people who want to publish blogs, by following these steps.
Before you begin, you must have already registered a domain name with a .ma or other extension.
Table of Contents
How to link a domain name with Blogger?
To link your domain, you need to make changes both on the Blogger platform and in your client area.
On your Blogger interface
1. Click on Settings > Basic > Edit > Add a custom domain

2. Enter your custom domain name with “www”. Example: www.yourdomain.com and click “Save”.

If you see this error message “We were unable to verify your rights to this domain. Error 12.”, it means Blogger was unable to confirm that the domain belongs to you.

In this case, Blogger provides you with two DNS records for your domain name: The first CNAME name is the same for everyone, with the Name being “www” and the Destination being “ghs.google.com”. The second CNAME name is unique to your blog and your Google account, so it is different for each person.
4. Copy these two records.
In your client area at Cap Connect
5. Click on “Domains”

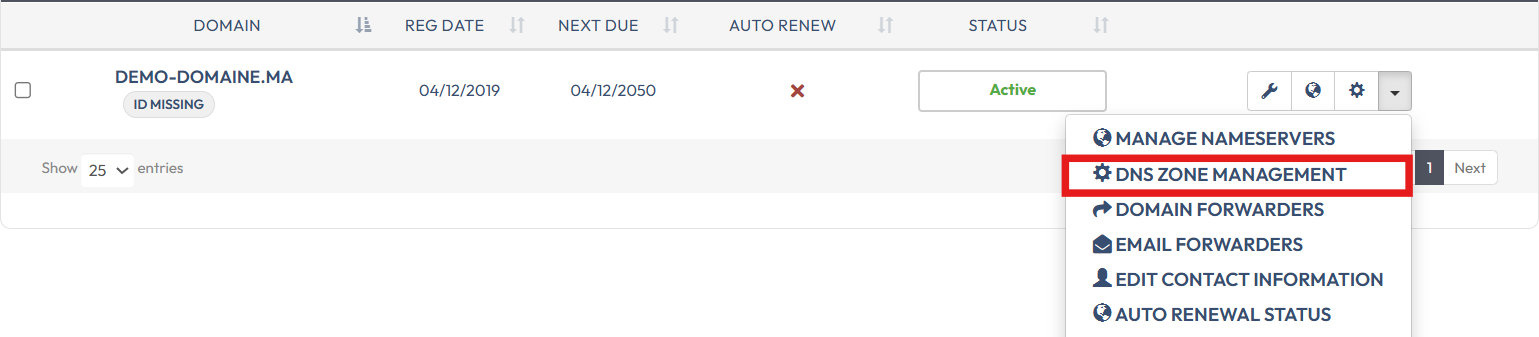
6. Go to the domain in question, click on the configuration icon

Or, click on the menu on the right, then click on “DNS Zone Management”
7. If the DNS zone is not created, click on “Yes, Create”
8. Scroll down to the Quick Setup section and click on Apply DNS Configuration.

Your initial Blogspot address will automatically redirect to your new domain. If you still encounter an error after 24 hours, it means that your configuration was not entered correctly. You should repeat the process.
* Note: Propagation of these changes usually takes between 1h and 24h