To link your domain name with your Wix site, you must first activate a Premium Plan that allows you to link your domain.
Before proceeding with the linking step, you must first add your domain to your Wix account.
Table of Contents
Add my domain name to my Wix account
1. Log in to your Wix account. Click on the “Site” tab and then on “Connect Domain” to add your domain name.

2. Choose the 2nd option “Connect your own custom domain” and click the “Save and continue” button.

3. Enter your domain, and select the company hosting your domain from the dropdown menu.
4. Choose the method that suits you to link your domain.
Link my domain name to my Wix account
1st method: Changing name servers (nameservers)
Wix should provide you with their DNS. (example shown in the screenshot below):

Once you have your DNS, you can enter them in the domain name settings in your Cap Connect client area.
Go to your Client Area and click on “Domains”

Click on “Name Servers” on the row of the domain name in question.

Select “Use custom nameservers”, delete Cap Connect’s DNS, replace them with the DNS provided by Wix, and click on “Change DNS servers.”

Once the name servers for your domain are modified, wait up to 24 hours for them to propagate and for your domain to be linked to your account.
2nd method: CNAME configuration
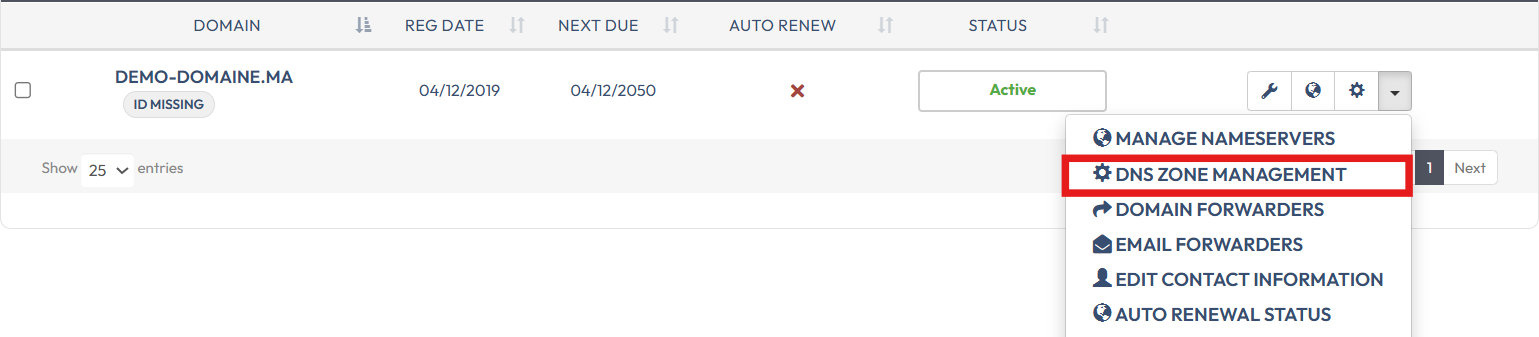
Go to your Client Area and click on “Domains”.
Go to the domain in question, click on the configuration icon

Or, click on the menu on the right, then click on “DNS Zone Management”
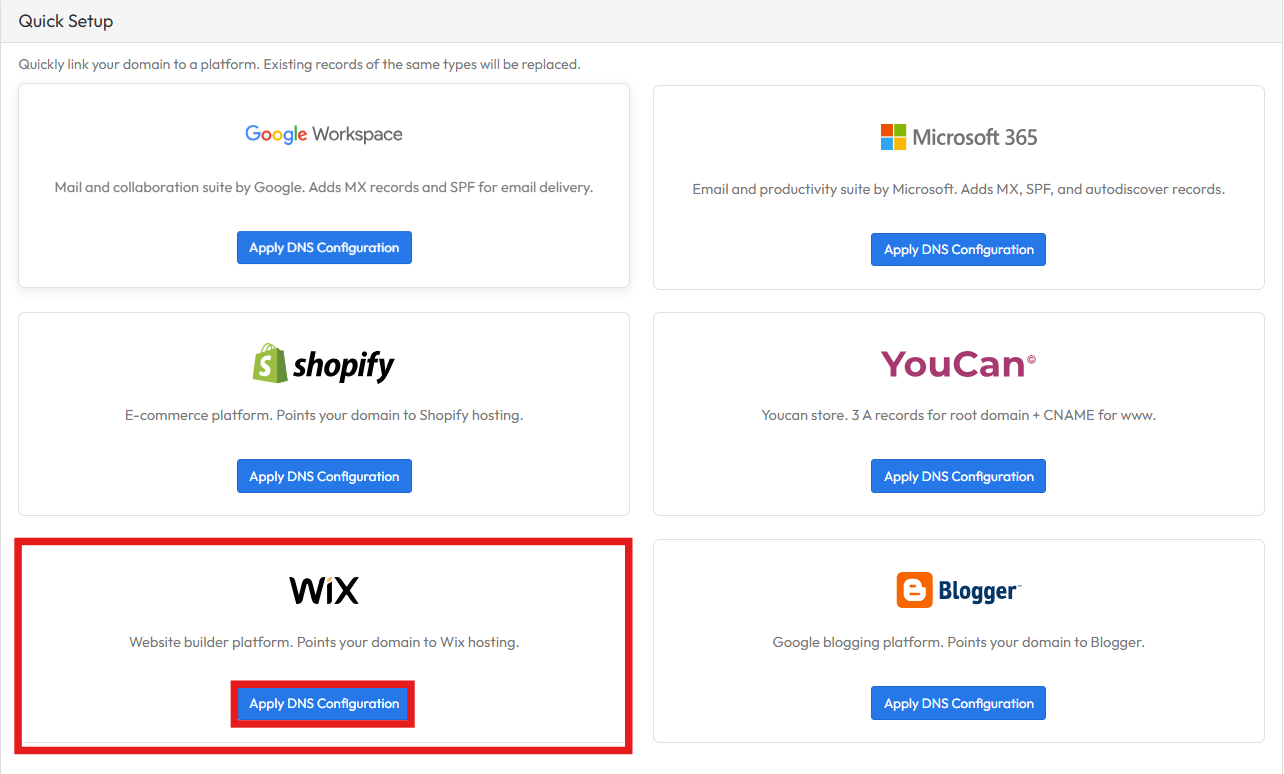
If the DNS zone is not created, click on “Yes, Create.”
Scroll down to the Quick Setup section, and click on Apply DNS configuration
Domain name propagation may take up to 48 hours to take effect.