Table of Contents
What is a cPanel Account?
cPanel is a Linux-based hosting control interface that provides an easy way to manage your hosting. With a cPanel account, you can perform multiple tasks to maintain your Web hosting: Create databases, create email accounts, manage your domain’s DNS zone, transfer files, perform and restore backups, manage PHP options, etc.
How to Create a cPanel Account?
If you have a server with cPanel, whether it’s a VPS Cloud, a dedicated server, or a reseller server, you can easily create cPanel accounts.
Each cPanel server administrator has root access to the server via WHM (Web Host Manager), a control panel that allows administrators to manage, customize, and monitor multiple cPanel hosting accounts simultaneously. In short, WHM is the parent interface of a cPanel account.
Below are the steps to get started quickly and create your cPanel accounts:
Log in to your WHM management interface.
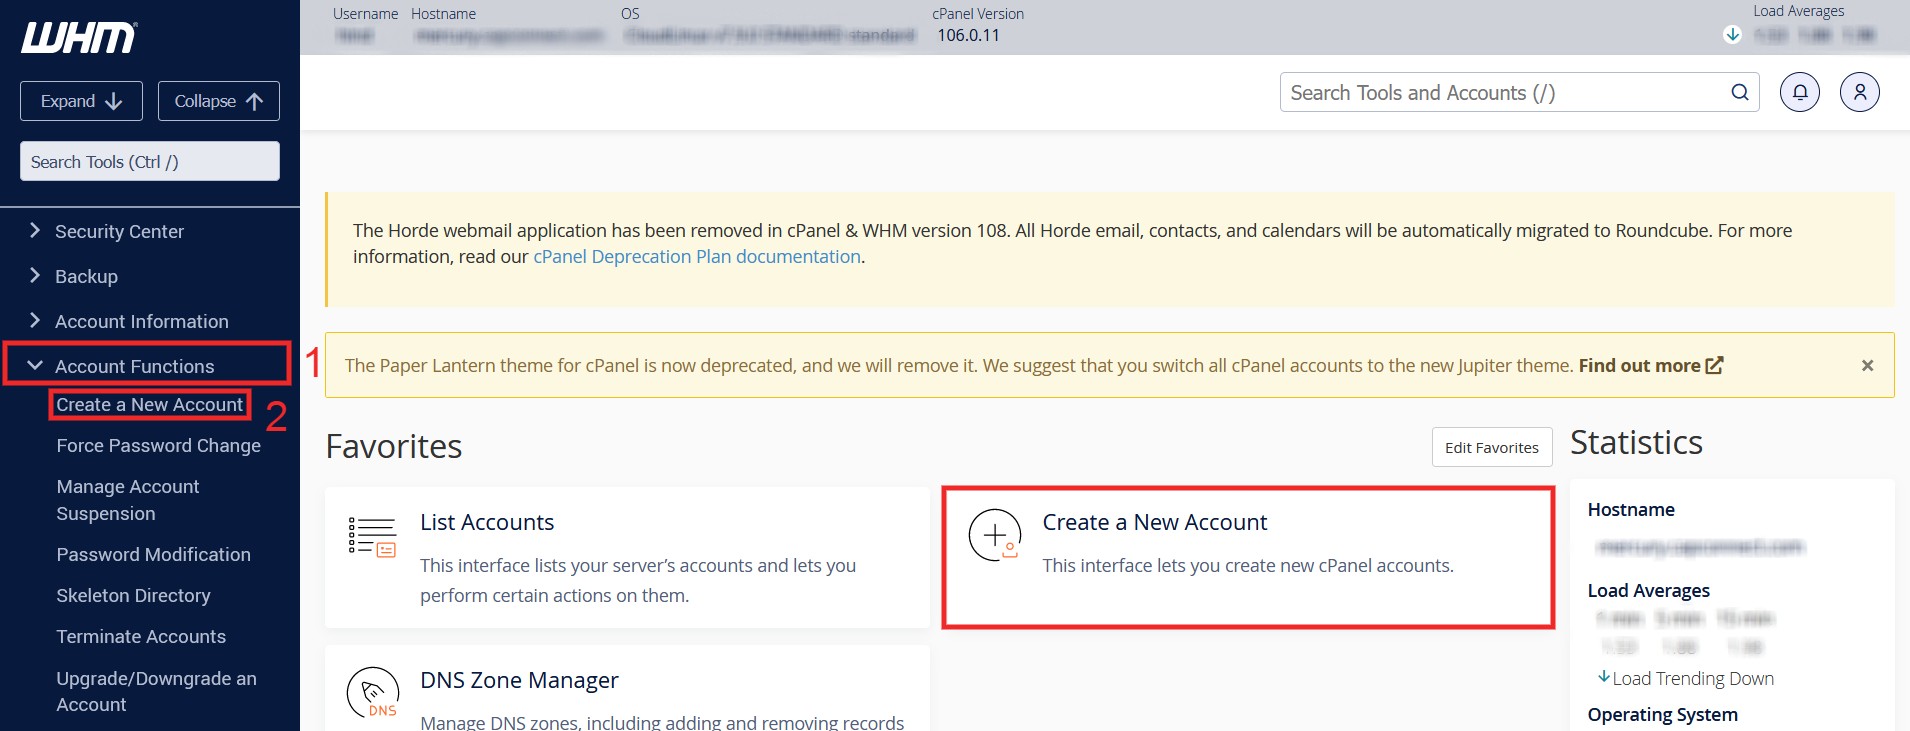
In the left menu, under Account Functions, click on Create a New Account. You can also find the shortcut displayed on the homepage as shown in the screenshot below.

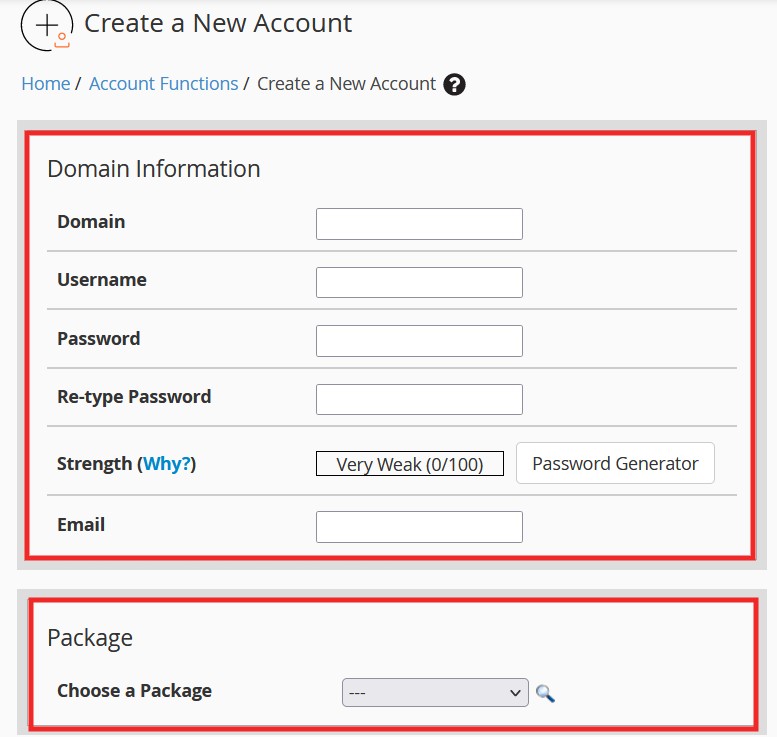
Enter the cPanel account information you want to create:
Domain: This field defines the domain name to associate with the cPanel client account you are about to create.
Username: This is the username that will be used to log in to the cPanel account. Usually, the username is pre-defined with the first letters of the domain name. However, you can modify it later.
Password: The password used to log into the new cPanel account. We recommend using the ‘Password Generator’ option, which allows you to choose the types of characters. The password will then be automatically generated.
Re-type Password: You must re-enter the previously entered password.
Email: This is the email address linked to the cPanel account. It can be used to reset the password in case it is lost or forgotten.
Package: When creating the cPanel account, you need to specify a Web package to link to the domain name. If you are a reseller, it is recommended to create packages if you plan to sell multiple accounts.

You do not need to modify the other sections unless you find it necessary. Scroll down and click Create.

That’s it! Your cPanel account has now been created. However, you will need to ensure that the DNS for your domain name is properly configured before you can start using your cPanel account.
You can log in to the new cPanel account via the link “https://www.yourdomainname.tld/cpanel”
Finally, remember that you can modify or delete a client account at any time through your WHM interface.